User authentication is one of the most critical aspects of modern mobile application development. In a world where security and convenience remain key requirements, implementing a flexible and reliable authentication system can significantly enhance your app's appeal to users. For businesses, this translates to improved user engagement, better retention rates, and stronger customer trust.
The Flutter framework, combined with Firebase, provides a comprehensive solution for managing user authentication. By integrating Firebase Authentication into your Flutter app, you can enhance security while offering users multiple login options, including social media accounts and email authentication.
In this article I will guide you through the process of integrating Firebase Authentication into your Flutter applications, implementing methods such as Google, Facebook, GitHub, and email/password authentication. By the end, you'll understand how to set up a robust and user-friendly authentication system tailored to your business needs.
Setting Up Firebase Authentication in Flutter
To get started with Firebase Authentication in your Flutter app, you first need to log in to your account or register at console.firebase.google.com. After logging in, create a project and configure it. The simplest way to proceed is through Flutter, which allows you to connect Firebase in just three steps. You can create a new application or connect Firebase to an existing project.
To add authentication, navigate to the Build tab on the left side of the Firebase console. From there, select various authentication methods. For instance, to enable Email and Password authentication, click on the Sign-in method, select Add new provider, choose Email/Password, and click Enable. With this, the setup for Email/Password authentication is complete.
Once the basic setup is done, you’ll need to integrate the necessary dependencies into your Flutter project.
In this project we will need the following packages:
cupertino_icons: ^1.0.8 - provides Cupertino-style icons for iOS-styled apps
firebase_core: ^3.8.0 - core library for integrating Firebase with a Flutter app. Required for Firebase initialization
firebase_auth: 5.3.3 - library for Firebase authentication. Supports login via email, Google, Facebook, and other providers.
google_sign_in: ^6.2.2 - a package for integrating Google Sign-In. Can be used with Firebase or as a standalone solution
sign_in_button: ^3.2.0 - provides ready-made styled buttons for login via platforms like Google and Facebook
flutter_facebook_auth: ^7.1.1 - library for Facebook authentication. Supports login, token retrieval, and user profile access
email_validator: ^3.0.0 - a convenient tool for validating email addresses against standard formats
go_router: ^14.6.1 - a package for managing routing in Flutter applications. Simplifies navigation and supports deep links
get_it: ^8.0.2 - service Locator implementation for managing dependencies and object injection
flutter_hooks: ^0.20.5 - a library for enhancing state management in Flutter using hooks (similar to React Hooks)
hooks_riverpod: ^2.6.1 - a modern and convenient state management solution combining Riverpod and hooks
crypto: ^3.0.6 - a library for cryptographic operations like hashing, HMAC, and AES
After installing all the dependencies, let’s create a file called general_providers. This file will include FirebaseAuth.instance, enabling access to it throughout the application.
import 'package:firebase_auth/firebase_auth.dart';
import 'package:hooks_riverpod/hooks_riverpod.dart';

final firebaseAuthProvider = Provider<FirebaseAuth>(
        (ref) => FirebaseAuth.instance);
I won’t go into the details of creating navigation in the application; instead, I’ll describe the main logic and provide a link to the GitHub repository at the end of the article.
Our application will consist of several layers: repositories, controllers, and screens. Interaction with Firebase will be handled in the repositories, while controllers will be used to facilitate communication between the screens and repositories.
Let’s start by implementing the repositories. First, we’ll create an abstract class called BaseAuthRepository. While it can be useful when creating additional repositories, in our case, there will be only one repository, so its importance is limited.
abstract class BaseAuthRepository {
  Stream<User?> get authStateChanges;
  User? getCurrentUser();
  Future<void> signIn({required String email, required String password});
  Future<void> signInWithCredential({required OAuthCredential credential});
  Future<void> signUp({required String email, required String password});
  Future<void> signOut();
  Future<void> resetPassword({required String email});
}
Here are the main methods that our repository should implement. Using authStateChanges, we will track changes in the user’s authentication state, while signInWithCredential will help create and log in to an account using Google, Facebook, or GitHub.
The implementation of these methods involves using the previously created firebaseAuthProvider to call the appropriate Firebase methods.
Next, we’ll create an AuthController that will accept data from screens, process it, and call repository methods. This controller will handle not only authentication but also user registration. To manage and display errors on the corresponding screens, we will create authenticationExceptionProvider, registrationExceptionProvider, and resetPasswordExceptionProvider. Additionally, we’ll set up an authControllerProvider to facilitate method calls.
final authenticationExceptionProvider = StateProvider<CustomException?>((_) => null);
final registrationExceptionProvider = StateProvider<CustomException?>((_) => null);
final resetPasswordExceptionProvider = StateProvider<CustomException?>((_) => null);

final authControllerProvider = StateNotifierProvider<AuthController, User?>((ref) => AuthController(ref));
The signIn method is used for authentication via email and password. It accepts the relevant data and forwards it to the repository for processing.
  Future<void> signIn({
	required String email,
	required String 	password
  }) async {
    try {
      await _ref.read(authRepositoryProvider).signIn(email: email,
password: password);
    } on CustomException catch (e) {
      _ref.read(registrationExceptionProvider.notifier).state = e;
    }
  }
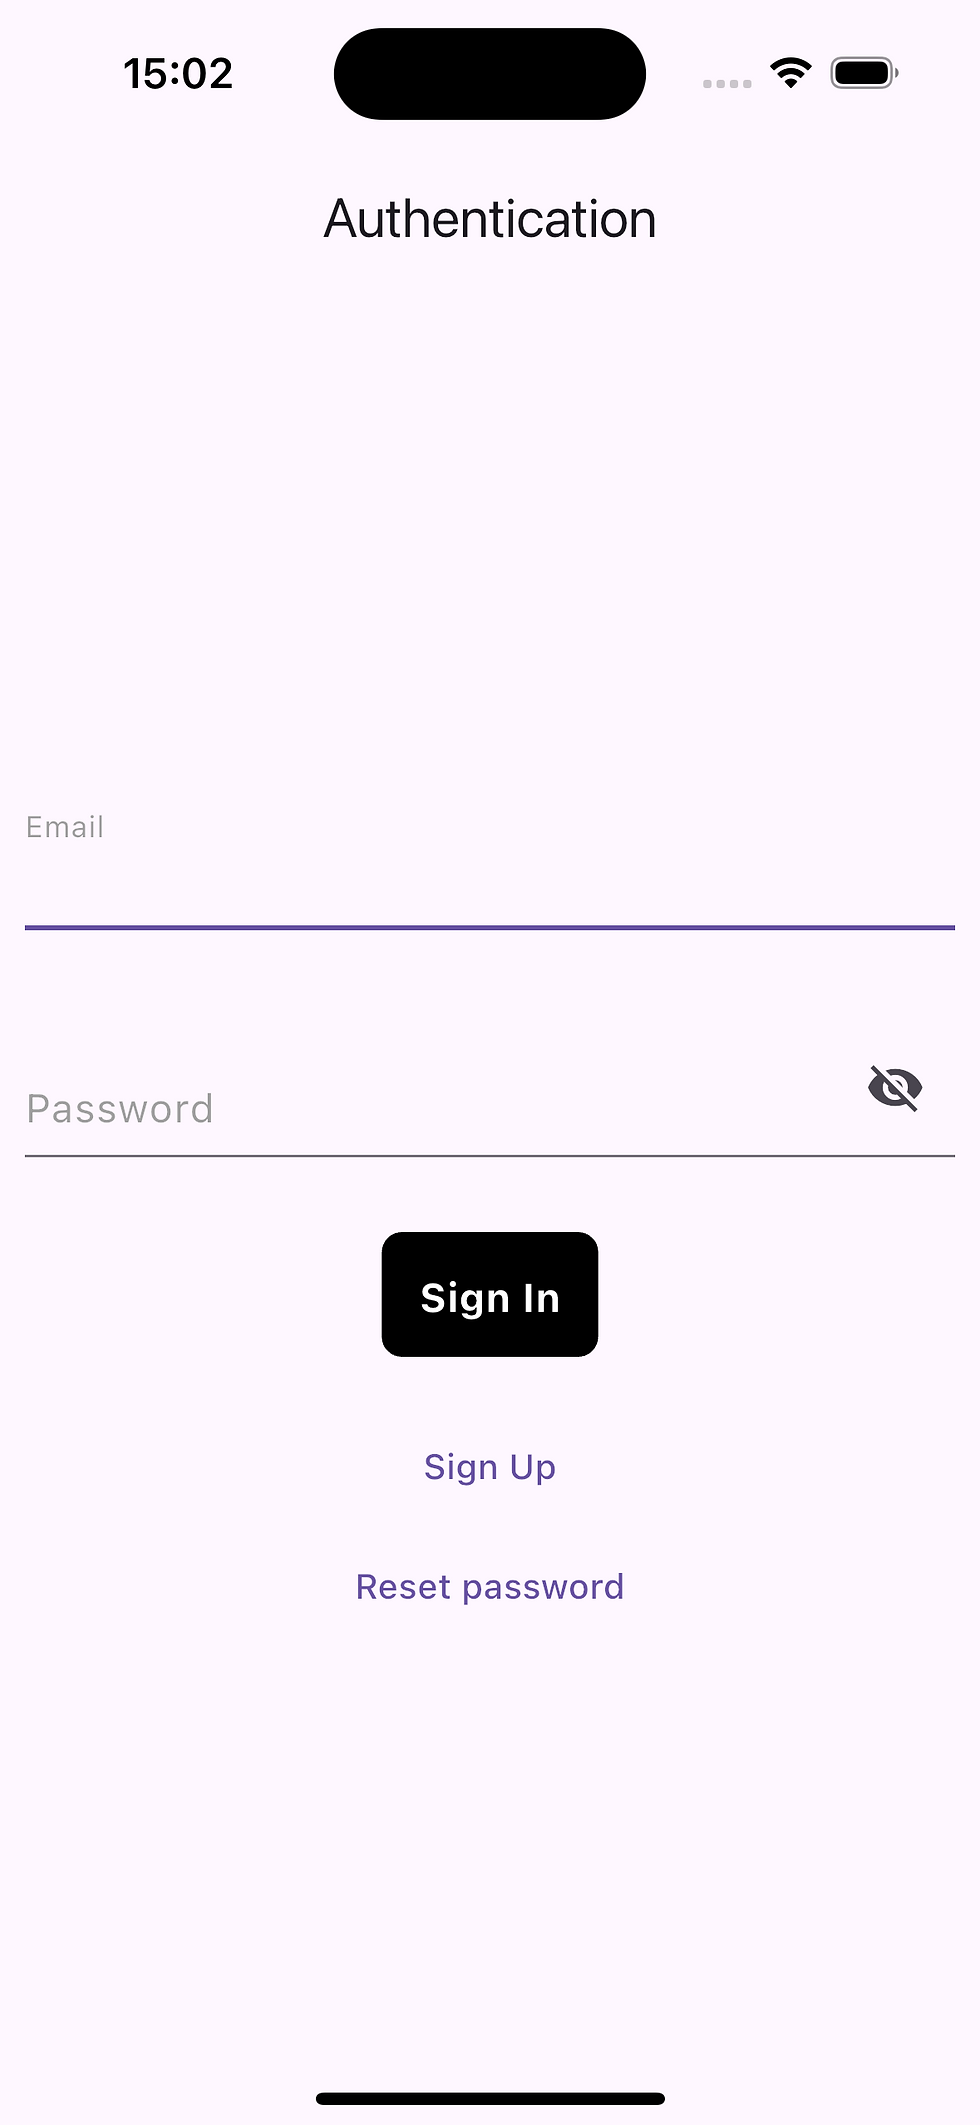
Let’s move on to creating the authentication page. This page should include fields for entering an email and password, a Sign In button, a Sign Up button to navigate to the registration screen, and a Reset Password button to initiate the password reset process.
class AuthenticationScreen extends ConsumerWidget {

  AuthenticationScreen({super.key});

  final formKey = GlobalKey<FormState>();
  final TextEditingController emailController = TextEditingController();
  final TextEditingController passwordController = TextEditingController();

  @override
  Widget build(BuildContext context, WidgetRef ref) {

    ref.listen<CustomException?>(authenticationExceptionProvider, (previous, next) {
      CustomSnackBar.showSnackBar(
        context,
        next!.message!,
        true,
      );
    });

    Future<void> login() async {
      if (formKey.currentState!.validate()) {
        await ref.read(authControllerProvider.notifier).signIn(
            email: emailController.text.trim(),
            password: passwordController.text.trim()
        );
        if(ref.read(authenticationExceptionProvider.notifier).state == null) {
          locator<NavigationHelper>().navigateTo(rootRoute);
        }
      }
    }

    return Scaffold(
      appBar: AppBar(
        title: const Text('Authentication'),
        automaticallyImplyLeading: false,
      ),
      resizeToAvoidBottomInset: false,
      body: Center(
        child: Form(
          key: formKey,
          child: Column(
            mainAxisAlignment: MainAxisAlignment.center,
            children: [
              CustomTextField(
                  controller: emailController,
                  hint: 'Email',
                  type: FieldType.text,
                  validator: (val) {
                    if (val != null && !EmailValidator.validate(val)) return 'Enter valid Email!';
                  }
              ),
              const SizedBox(height: 15,),
              CustomTextField(
                  controller: passwordController,
                  hint: 'Password',
                  type: FieldType.password,
                  validator: (val) {
                    if (val!.isEmpty) return 'Enter password!';
                  }
              ),
              CustomButton(
                  btnText: 'Sign In',
                  onTap: () => login(),
                  btnColor: Colors.black
              ),
              TextButton(
                onPressed: () {
                  locator<NavigationHelper>().navigateTo(registrationRoute);
                },
                child: const Text('Sign Up'),
              ),
              TextButton(
                onPressed: () => locator<NavigationHelper>().navigateTo(resetPasswordRoute),
                child: const Text('Reset password'),
              ),
            ],
          ),
        ),
      ),
    );
  }
}
Here is the final result. If an error occurs, a SnackBar is displayed. Before submitting, the data in the fields is validated.
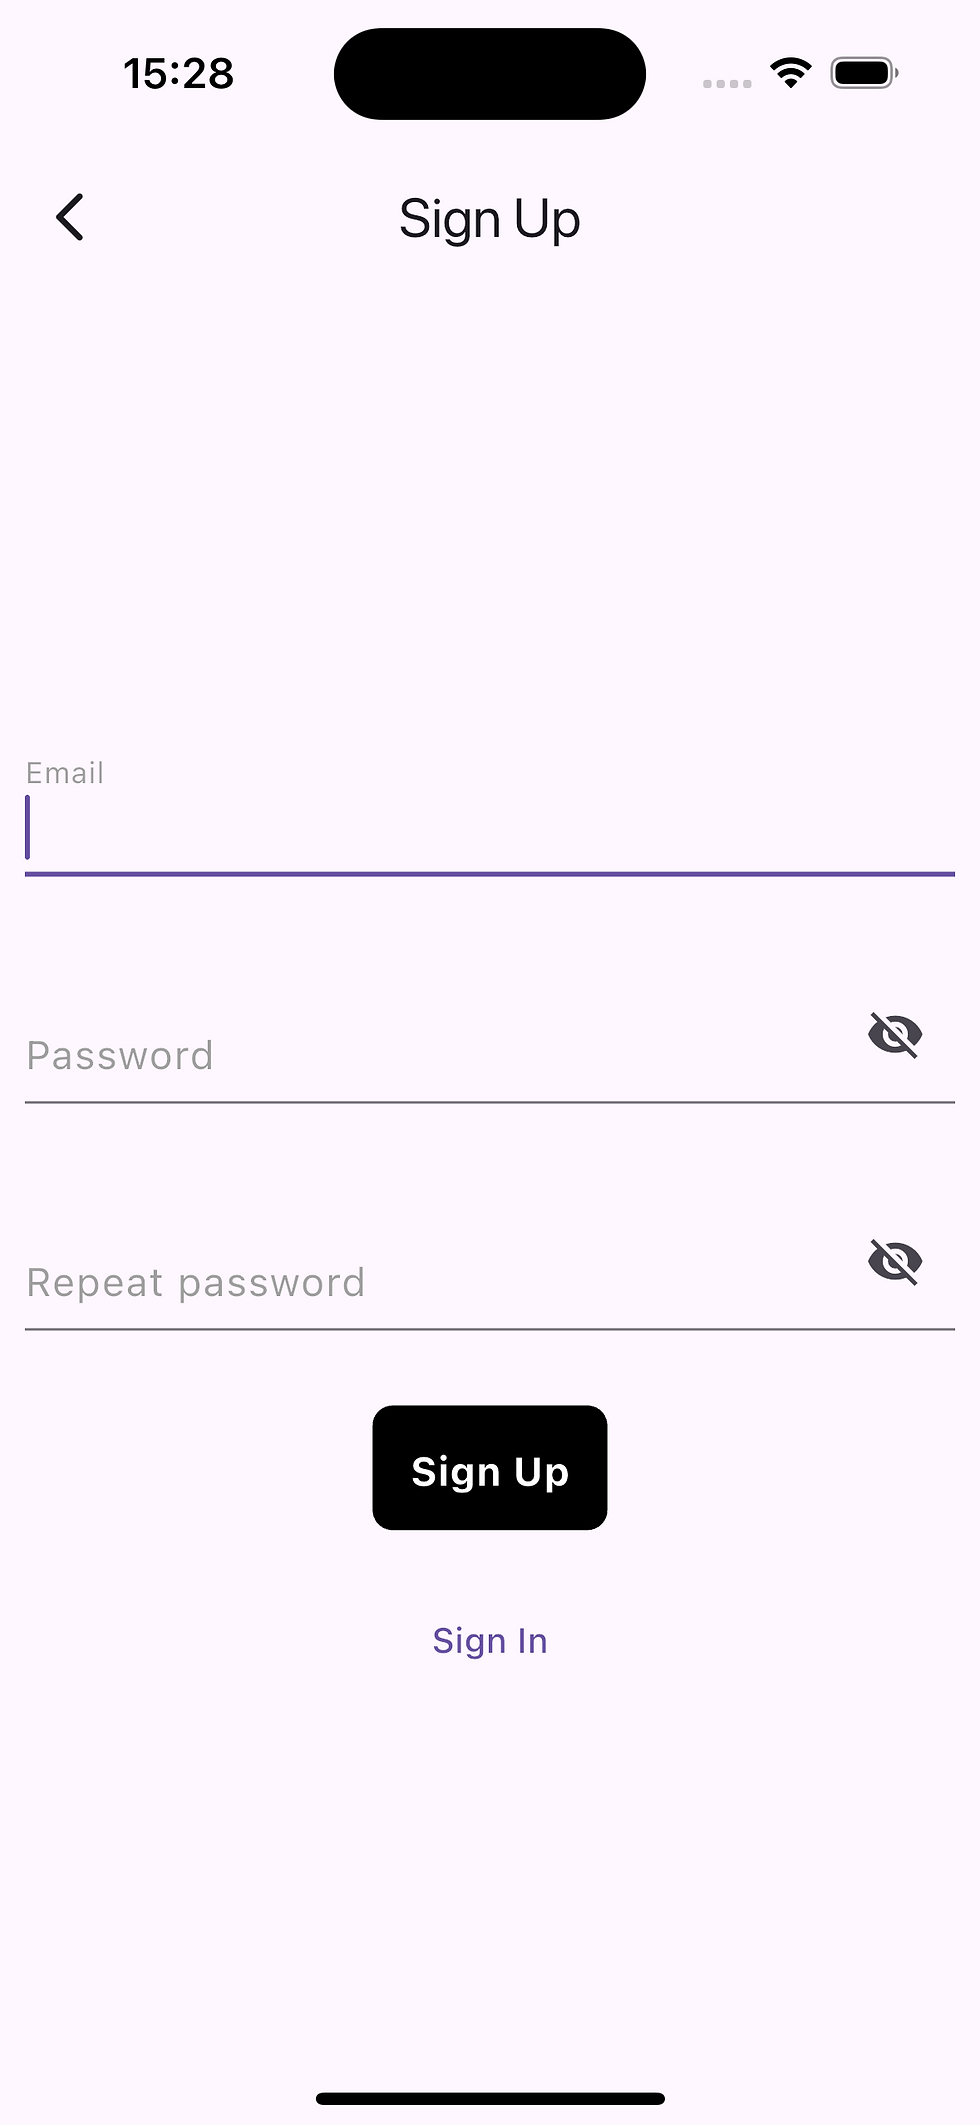
Now let’s move on to creating the registration page. The code for this page is similar to the authentication page, so we won’t focus on its implementation.
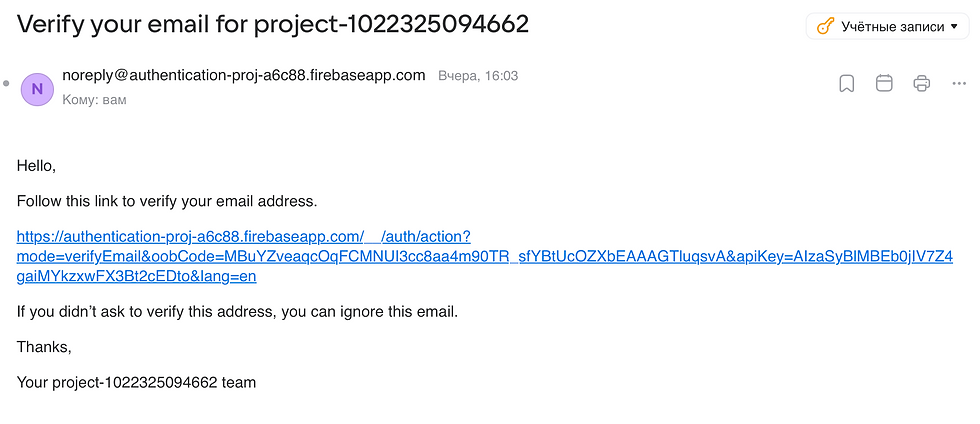
After user registration, Firebase sends a verification email to the user’s provided address. Following this scenario, we should restrict the user’s access to the application until they verify their email.
To manage the display of the verification screen and the user’s dashboard, we’ll create a firebase_stream service. This service will monitor changes to the user’s data and determines which screen to display — for example, a verification screen for unverified users who have registered by email.
Thus, if there is an authenticated user in the system whose email is unverified and the registration method is "password" (i.e., via email), the verification screen will be displayed.
class FirebaseStream extends ConsumerWidget {
  const FirebaseStream({super.key});

  @override
  Widget build(BuildContext context, WidgetRef ref) {
    return StreamBuilder<User?>(
      stream: ref.read(firebaseAuthProvider).authStateChanges(),
      builder: (context, snapshot) {
        if (snapshot.hasError) {
          return const Scaffold(
              body: Center(child: Text('Something go wrong!')));
        } else if (snapshot.hasData) {
          if (!snapshot.data!.emailVerified &&
              snapshot.data!.providerData.first.providerId == 'password') {
            return const VerifyEmailScreen();
          }
          return const AccountScreen();
        } else {
          return AuthenticationScreen();
        }
      },
    );
  }
}
Thus, if there is an authenticated user in the system whose email is unverified and the registration method is "password" (i.e., via email), the verification screen will be displayed.
The check for the verification method is necessary to prevent users who logged in via Facebook or GitHub from being redirected to the verification screen, as Firebase only verifies emails with the @gmail.com domain. Any other domain will remain unverified.
Now, let’s create the verification page. This page will not only restrict the user's actions but also allow them to resend the verification email.
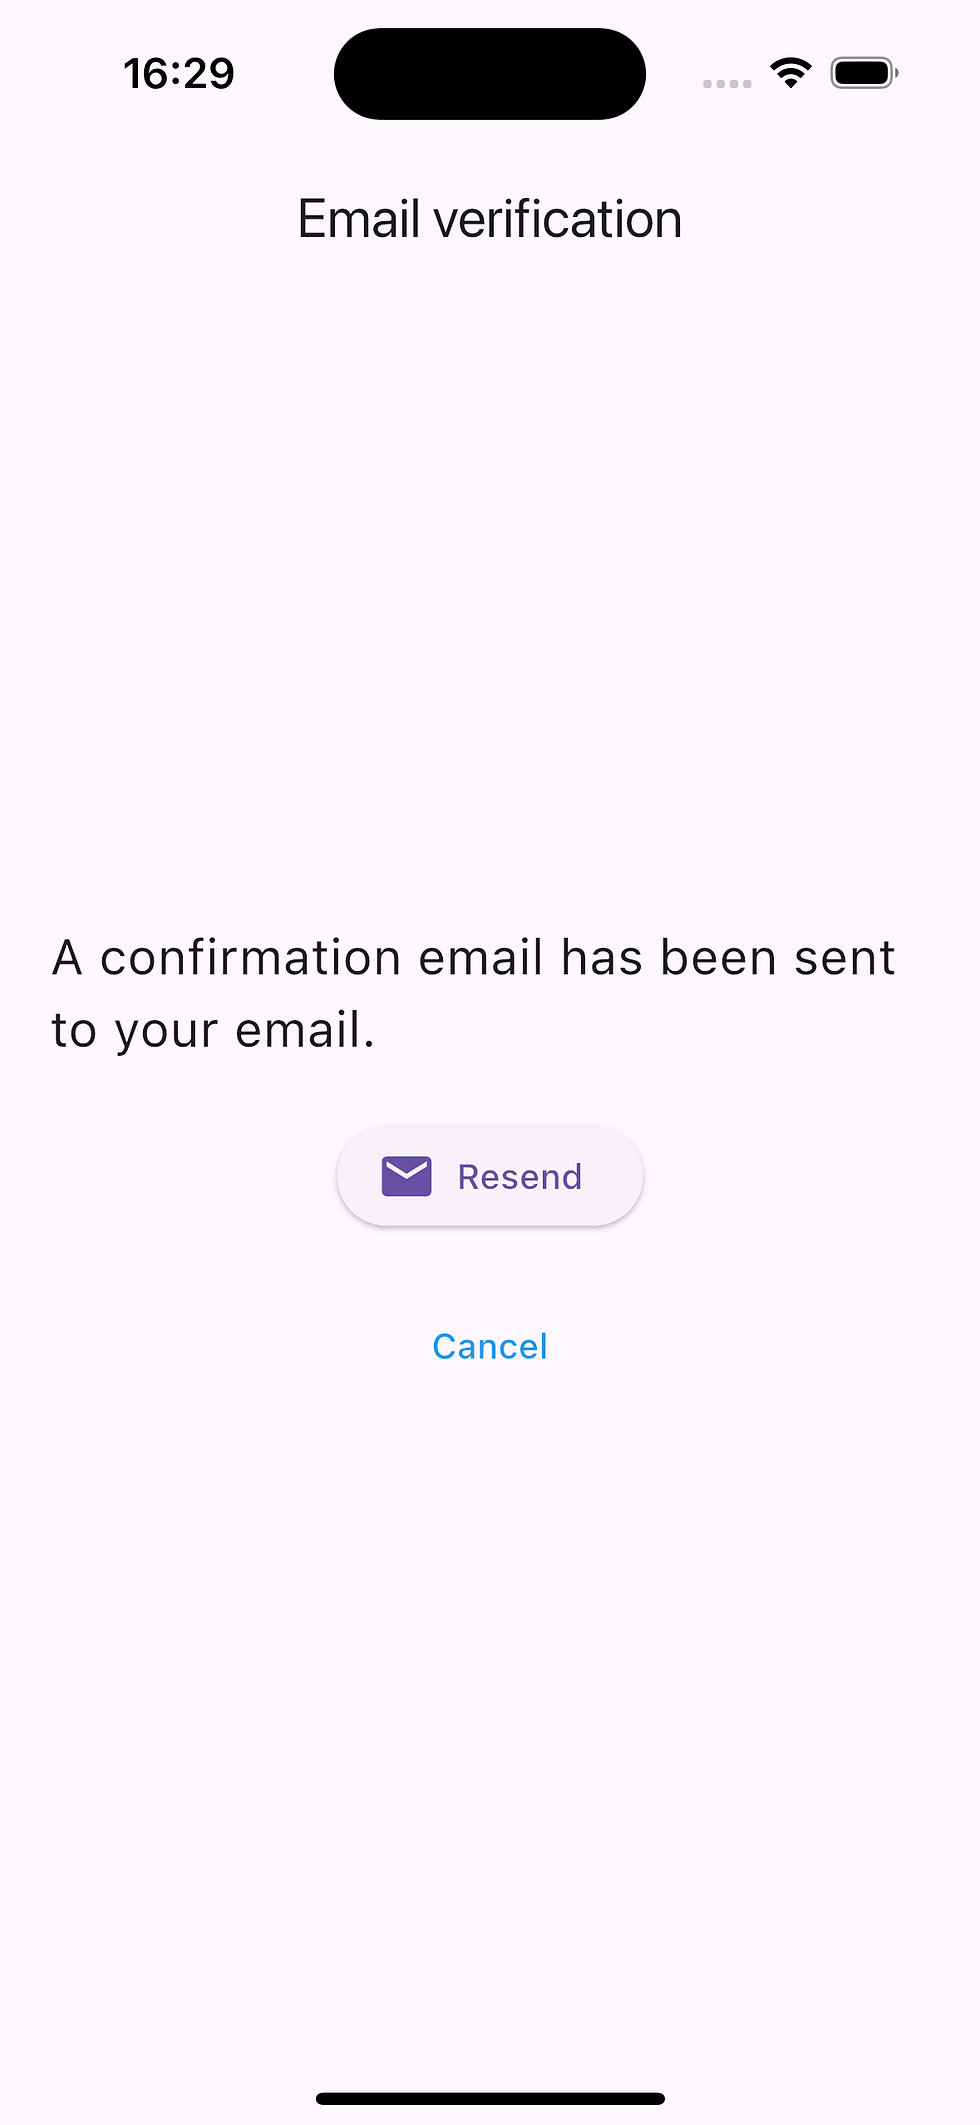
Let me explain the method for sending the verification email in a bit more detail. The email sending process in Firebase involves using the sendEmailVerification method on the user object. Once this method is called, the flag canResendEmail is set to false for 20 seconds. This temporary restriction disables the Resend button, effectively preventing excessive system requests caused by repeated clicks on the button. This approach not only ensures system stability but also enhances user experience by seamlessly managing email verifications.
Future<void> sendVerificationEmail() async {
      try {
        final user = ref.read(authControllerProvider.notifier).getCurrentUser();

        if(user != null) await user.sendEmailVerification();

        setState(() => canResendEmail = false);
        await Future.delayed(const Duration(seconds: 20));
        setState(() => canResendEmail = true);
      } catch (e) {
        if (mounted) {
          CustomSnackBar.showSnackBar(
            context,
            '$e',
            true,
          );
        }
      }
    }
I won’t go into detail about creating the dashboard page, as it’s quite simple: it displays the email and includes two buttons—one for resetting the password and the other for logging out of the account.
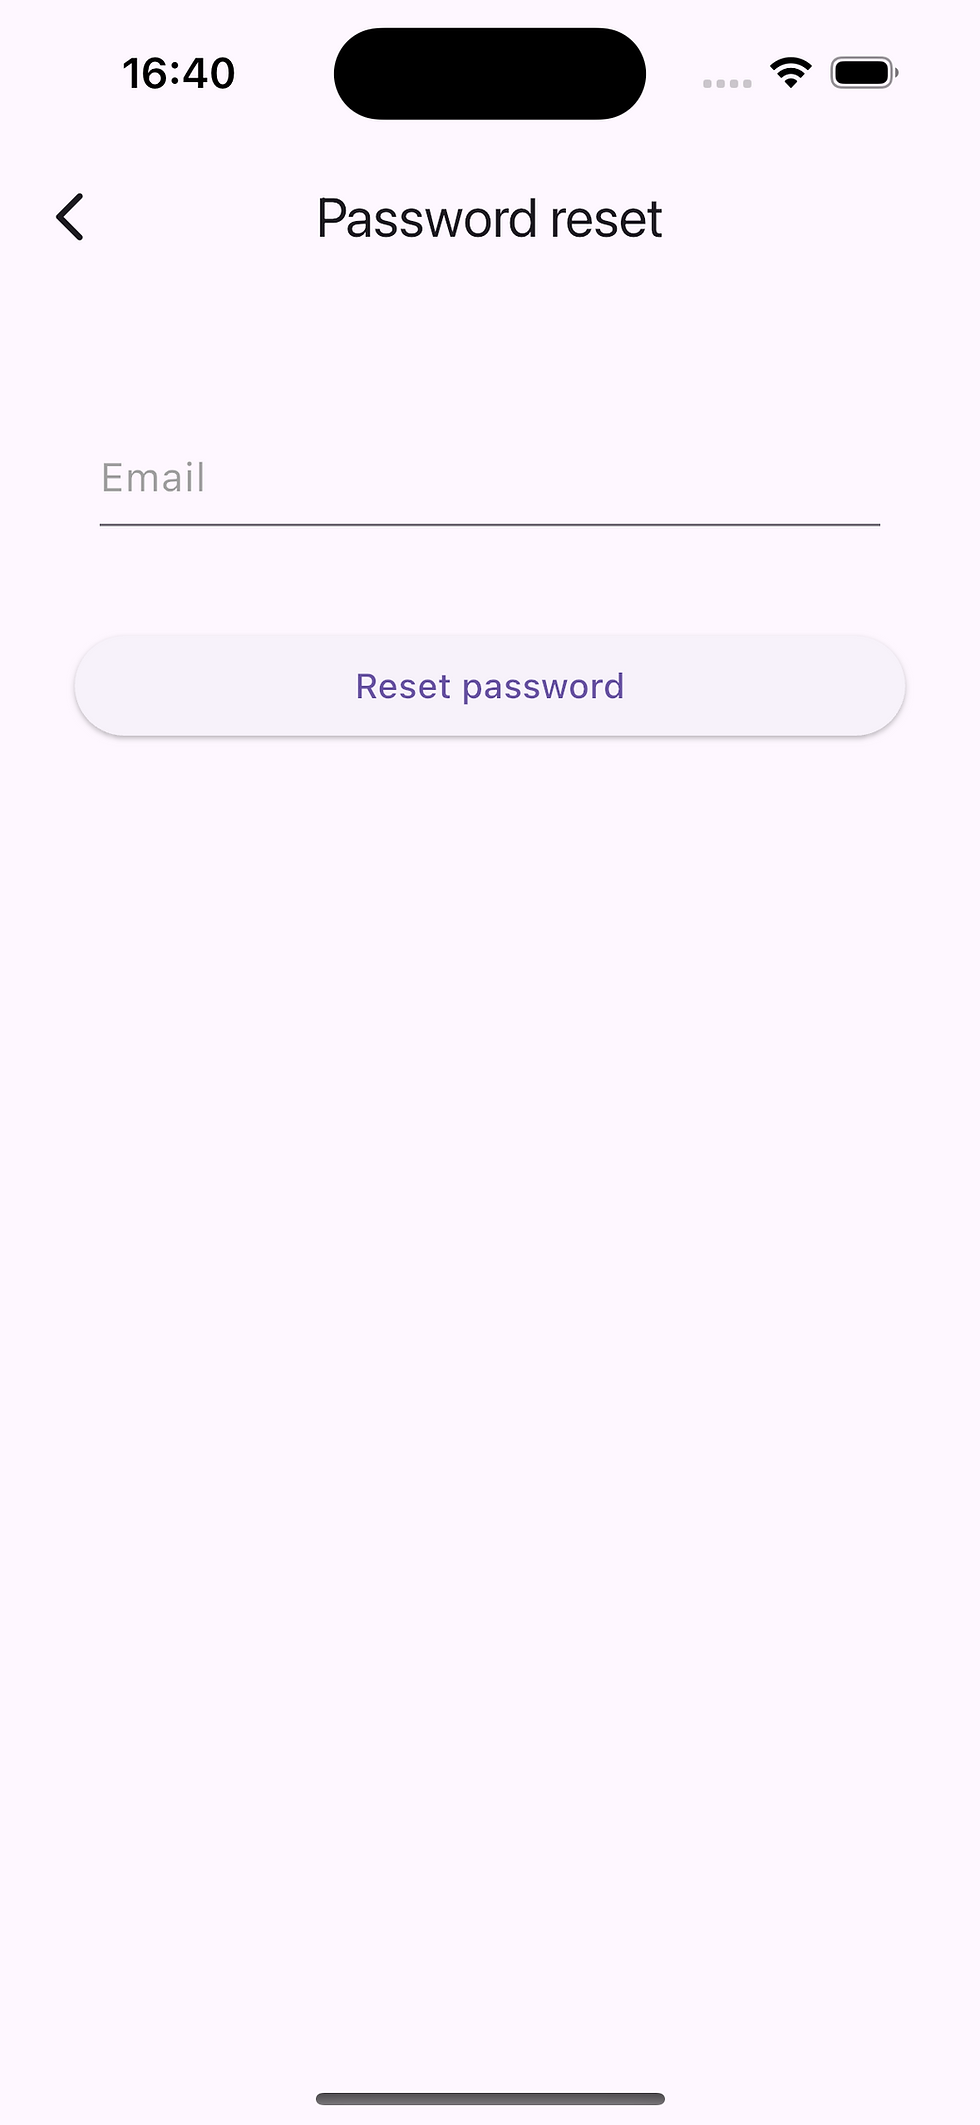
The password reset screen, on the other hand, only has a field for entering the email and a Reset Password button.
Advanced Authentication Methods: Google, Facebook, and GitHub
Google Authentication
The first step to set up Google Authentication is to add a new provider in Firebase.

Next, following the instructions, we’ll go to the project settings and add the SHA certificate fingerprint to our Android application.
SHA-1 can be configured using the terminal and the following command: MacOS - keytool -list -v \ -alias androiddebugkey -keystore ~/.android/debug.keystore Windows - keytool -list -v \ -alias androiddebugkey -keystore %USERPROFILE%\.android\debug.keystore The default password for the debug keystore — android
After adding Google Authentication, it can be used on Android devices.
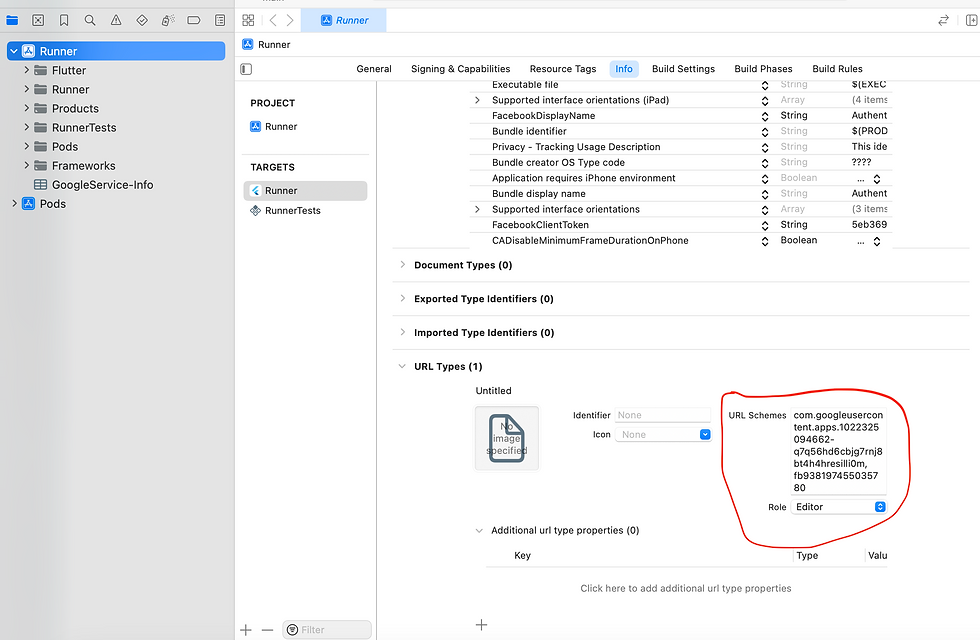
For iOS devices, navigate to the file /ios/Runner/GoogleServices-Info.plist, where you'll find and copy the REVERSED_CLIENT_ID. Next, open the Runner of your app in Xcode and add the copied string into the URL Types section under the Info tab.
With the setup complete, let's move on to the code. First, we'll add the signInWithGoogle() method in the Authentication Controller.
Future<void> signInWithGoogle() async {
    try {
      GoogleSignInAccount? googleAccount = await GoogleSignIn().signIn();
      GoogleSignInAuthentication? googleAuth = await googleAccount?.authentication;
      var credential = OAuthCredential(
        providerId: 'google.com',
        signInMethod: 'oauth',
        idToken: googleAuth?.idToken,
        accessToken: googleAuth?.accessToken,
      );
      _ref.read(authRepositoryProvider).signInWithCredential(credential: credential);
    } on CustomException catch (e) {
      _ref.read(authenticationExceptionProvider.notifier).state = e;
    }
  }
As you can see, the user signs in with their Google account, after which an OAuthCredential is created based on the tokens. Then, the signInWithCredential method is triggered for authentication on the Firebase side.
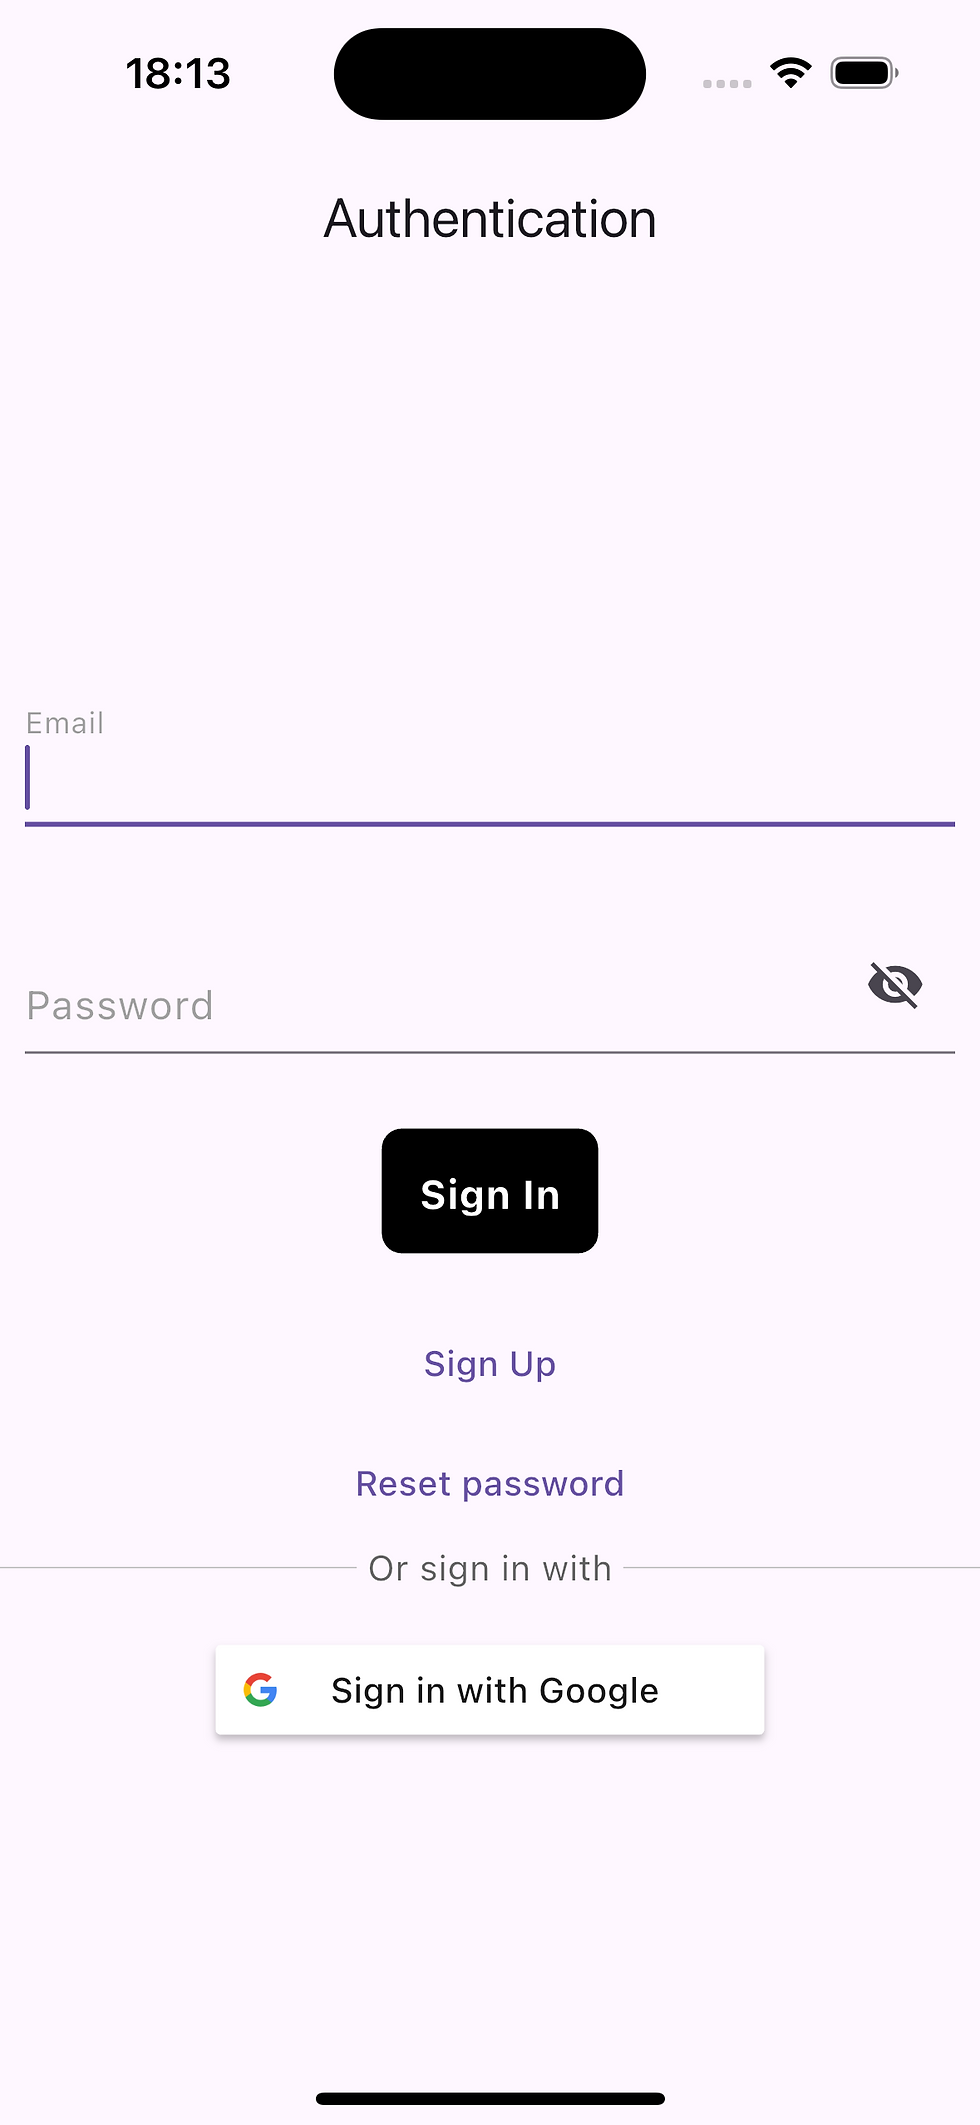
Now, let's add a button for Google login on the authentication page. To make this easier, we can use the sign_in_button package, which provides ready-made solutions for this.
SignInButton(
	Buttons.google,
    onPressed: () async {
    	await ref.read(authControllerProvider.notifier). signInWithGoogle();
        if(ref.read(authenticationExceptionProvider.notifier).
        state == null) {
        	locator<NavigationHelper>().navigateTo(rootRoute);
         }
     }
 ),
Facebook Authentication
Authentication through Facebook is more complex than with Google or GitHub, and recent updates have introduced several restrictions that make it more challenging to integrate the Facebook API into applications.
When creating an app on the Facebook developers site, you need to create your own business. The difficulty lies in verifying the business, as you need to attach documents, contact details, etc. Many users also complain about frequent account blocks. In test mode, only accounts with certain roles and permissions can be used for sign in app.
For iOS authentication, Facebook has introduced markers for limited login. Upon successful authentication via limited login, a global instance of AuthenticationToken is created. A random code is provided in the returned marker, which your app can use to verify the token. Additionally, the profile instance is populated with basic user information. (More details can be found here: Facebook Developer Docs on Limited Login)
First, you need to create a Facebook account, then go to https://developers.facebook.com and log in with your developer account. Next, go to the My Apps tab and create a new app. In the use case scenarios, choose Facebook Login. Then, in the settings, enable the email field.
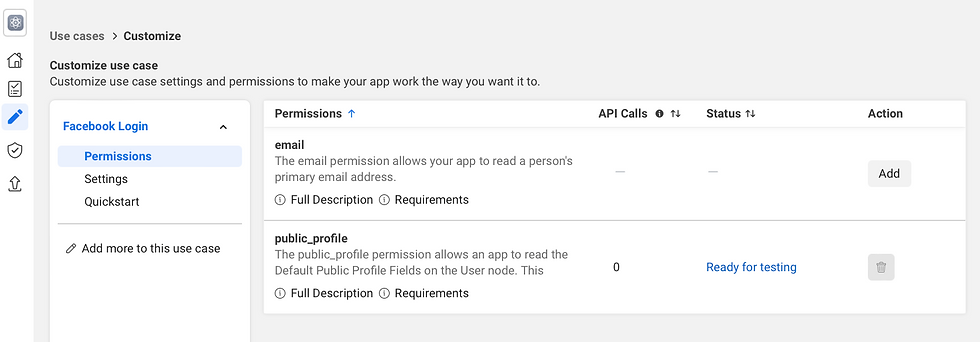
Now, let’s add a new provider in Firebase. In the opened window, copy the OAuth redirect URI, return to the Authentication settings in Facebook, and paste it into the OAuth redirect URI field. Then, save the changes.
To complete the setup in Firebase, go to the App Settings section and copy the App ID and App Secret. Then, return to Firebase and paste the values into the corresponding fields. Save the changes.
For further iOS setup, I recommend using the guide on Facebook Developer Docs for iOS Login, where you’ll find a generated code with the App ID and Token specific to your project. This code needs to be added to the /ios/Runner/Info.plist file. Then, open Xcode, go to the Info tab, find the iOS project ID, and paste it into the corresponding field on the website. Finally, save the changes.

Now, let's open the equivalent page for the Android part of our application: Facebook Login for Android. The main setup involves adding constant strings with the App ID and Token for our app into the android/app/src/main/res/values/strings.xml file, which will later be used in the AndroidManifest.xml. If the strings.xml file doesn't exist, you can create it using the command touch FILE_PATH (the path you specified earlier). Then, simply copy and paste the strings into the AndroidManifest.xml. Afterward, fill in the fields with the app name and the activity class name (add .MainActivity to the app name).
Creating the Facebook login button is similar to the Google login button, with the only difference being the button types.
Now, let’s focus on the controller. As mentioned earlier, Facebook introduced limited login, which returns a token that Firebase cannot accept in its current structure. To address this, we’ll create a token_service that will contain two methods to help adjust the token's structure.
class TokenService {
  String generateNonce([int length = 32]) {
    final charset =
        '0123456789ABCDEFGHIJKLMNOPQRSTUVXYZabcdefghijklmnopqrstuvwxyz-._';
    final random = Random.secure();
    return List.generate(length, (_) => charset[random.nextInt(charset.length)])
        .join();
  }

  String sha256ofString(String input) {
    final bytes = utf8.encode(input);
    final digest = sha256.convert(bytes);
    return digest.toString();
  }
}
Since limited login applies only to iOS, we will add some checks to determine the device type. Additionally, we will generate a nonce and a rawNonce. The nonce will be sent when calling the login dialog, while the rawNonce will be used when generating credentials for Firebase.
These checks and nonces will ensure proper handling of the login process on iOS devices and help in generating the correct credentials structure for Firebase authentication.
Future<void> signInWithFacebook() async {
    var nonce = null;
    var rawNonce = null;
    if(Platform.isIOS){
      rawNonce = TokenService().generateNonce();
      nonce = TokenService().sha256ofString(rawNonce);
    }
    final result = await FacebookAuth.instance.login(
        loginTracking: LoginTracking.limited,
        nonce: nonce
    );
    if (result.status == LoginStatus.success) {
      final AccessToken accessToken = result.accessToken!;
      var credential = FacebookAuthProvider.credential(accessToken.tokenString);
      if(Platform.isIOS){
        credential = OAuthCredential(
          providerId: 'facebook.com',
          signInMethod: 'oauth',
          idToken: accessToken.tokenString,
          rawNonce: rawNonce,
        );
      }
      _ref.read(authRepositoryProvider).signInWithCredential(credential: credential);
    } else {
      _ref.read(authenticationExceptionProvider.notifier).state = CustomException(message: result.message);
    }
  }
For testing, you need to use the login and password that you provided when creating this application in Facebook. This ensures you can access the Facebook developer account and test the integration with the correct credentials.
GitHub Authentication
GitHub authentication is the simplest in this article. You need to go to the site https://github.com/settings/developers, then navigate to the OAuth Apps tab and create a new application.
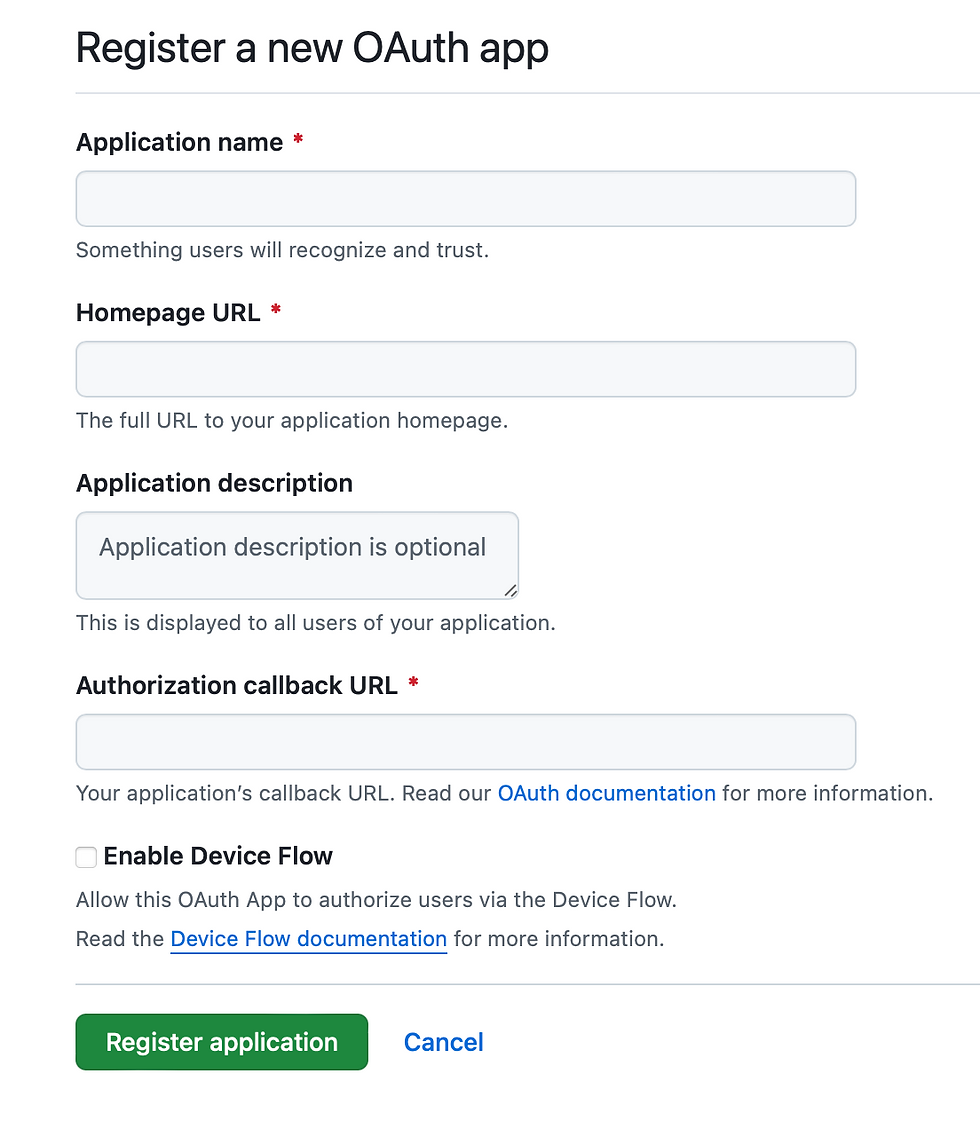
Application name: Choose any name for your project.
Homepage URL: Provide the link to your repository on GitHub.
Authorization callback URL: This URL should be copied from the popup window that appears when adding a new provider in Firebase.
After creating the project, copy the Client ID and the generated Client Secret and paste them into Firebase, then save the changes.
Next, go to the App Settings in Firebase, copy the Encoded App ID for iOS, and insert it into the URL Types section through Xcode. This completes the setup for GitHub authentication.
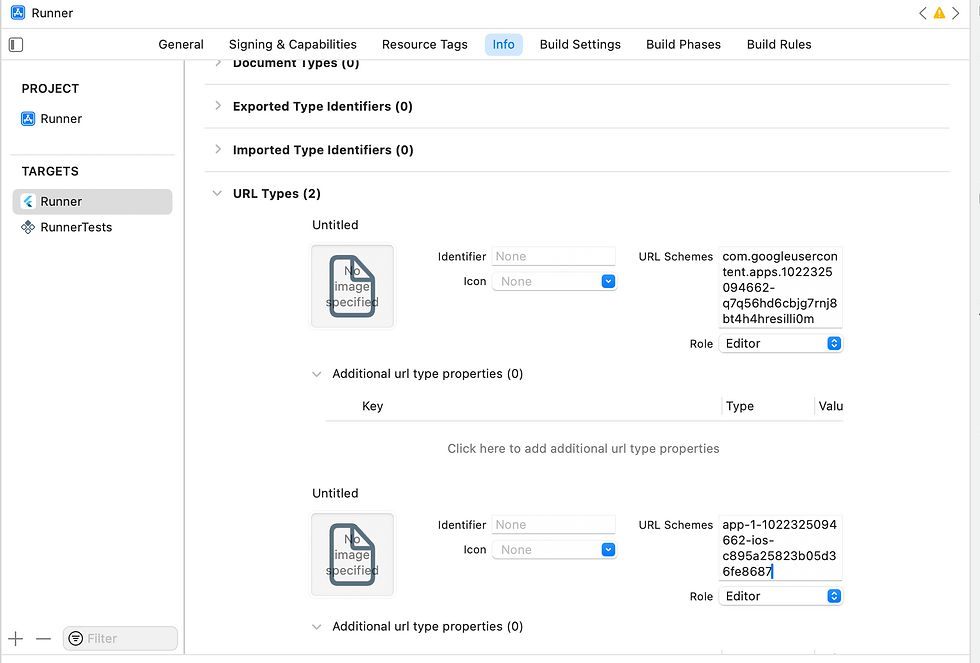
Now, let’s move on to the code. After adding the GitHub authentication button, the authentication screen will look as follows.
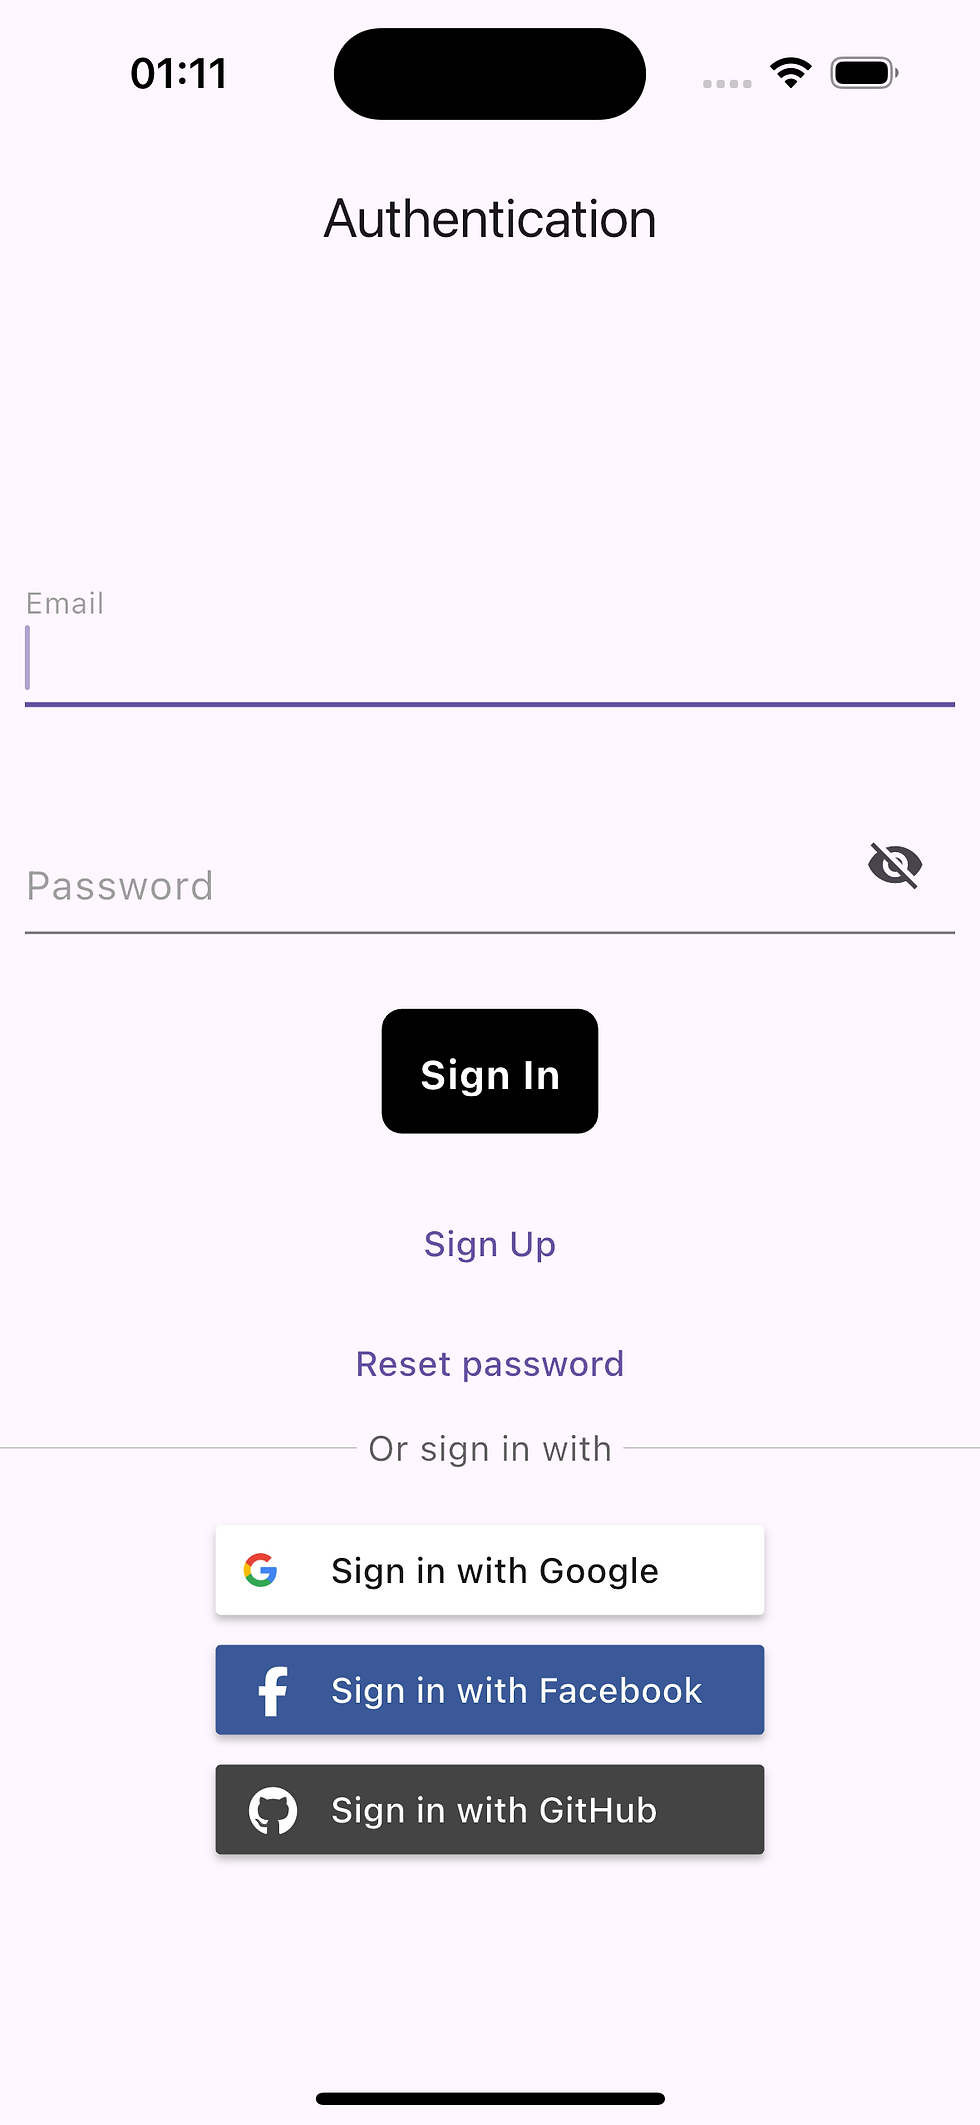
Let’s add a new method called signInWithProvider to our repository.
@override
  Future<void> signInWithProvider({required AuthProvider provider}) async {
    try {
      await _ref.read(firebaseAuthProvider).signInWithProvider(provider);
    } on FirebaseAuthException catch (e) {
      throw CustomException(message: e.message);
    }
  }
The controller simply calls the signInWithProvider method and passes the GithubAuthProvider to it. This allows the controller to initiate the GitHub authentication process while keeping the logic in the repository.
Future<void> signInWithGitHub() async {
    try {
      _ref.read(authRepositoryProvider).signInWithProvider(provider: GithubAuthProvider());
    } on CustomException catch (e) {
      _ref.read(authenticationExceptionProvider.notifier).state = e;
    }
  }
Why Choose Igniscor for Flutter Development support
When it comes to Flutter app development and authentication solutions, Igniscor stands out as a trusted partner. With a wealth of experience in crafting cross-platform applications, Igniscor is committed to delivering innovative and reliable solutions tailored to your specific needs. Our expertise spans seamless integration of Firebase Authentication and other backend services, ensuring your app is secure, scalable, and user-friendly. Whether you're a startup looking to establish a strong foundation or an enterprise aiming to enhance your digital presence, we have the skills and insights to bring your vision to life.
Conclusion
In this article, we've explored how to implement authentication in a Flutter app using Firebase with various providers, including Email/Password, Google, Facebook, and GitHub. We covered the necessary configurations in Firebase and detailed the steps for each authentication method, including how to handle platform-specific requirements for iOS and Android.
By following these steps, you can set up a secure and scalable authentication system in your Flutter app, offering multiple login methods to cater to diverse user preferences. This not only enhances user satisfaction but also ensures a robust and reliable foundation for your mobile application.
If you’re looking to implement advanced authentication features or need expert guidance for your mobile app development, don't hesitate to reach out to Igniscor. Our team of experts is here to help you build applications that exceed expectations and deliver exceptional user experiences.Let us handle the complexities of development while you focus on your business objectives.
Useful links:
https://github.com/chuvakpavel/Flutter.Authentication - repo with realization
https://firebase.google.com - firebase official website
https://pub.dev/packages/firebase_auth - firebase authentication package
https://developers.facebook.com - official Facebook site for developers


Comments