Artificial intelligence (AI) 🤖 is rapidly transforming multiple industries, offering new possibilities for innovation and efficiency. In the realm of mobile development 📱, AI has become a powerful tool for creating solutions that can analyse data, make decisions, and enhance user experiences in ways that were previously unimaginable.
AI techniques like machine learning and deep learning 🧠 are being increasingly applied to tackle complex challenges in various domains, including healthcare, finance, and agriculture. A significant area where AI is making a major impact is image classification 🖼️, enabling machines to identify patterns, objects, and categories within images.
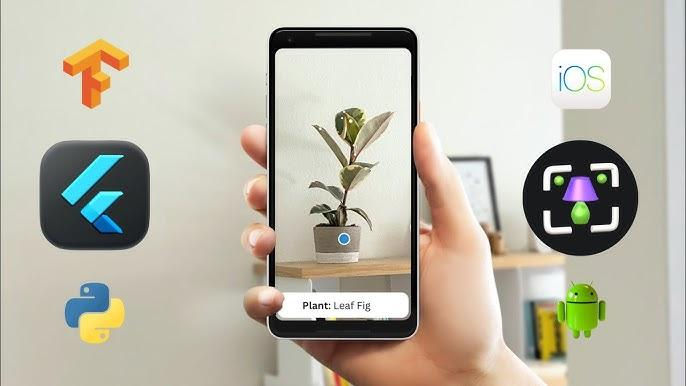
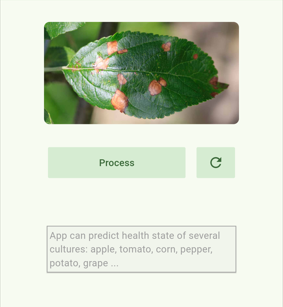
In this article, I share my journey of learning and working with AI in mobile development. It covers every step of the process, from preparing datasets 📊 and training models to create a AI-powered Flutter app. The program was created to help users easily identify plant diseases 🍃, assess plant health ✅, and receive care tips 🌿 — all from their smartphones, by analysing and predicting results based on images.
Setting up Python and essential tools
The first step in preparing your environment is to install Python. Ensure you have Python 3.x installed on your system. Once Python is set up, you’ll need to install the required Python packages for machine learning and model training. The primary packages include TensorFlow, Keras, and other necessary utilities for image processing. You can install these packages with the following command:
pip install tensorflow numpyTo train the AI model, I used the Plant village dataset, which is widely recognised for its structured approach to plant disease classification. The dataset is organised by plant types and further subdivided into categories for healthy and diseased leaves. Here is an example of the dataset structure:
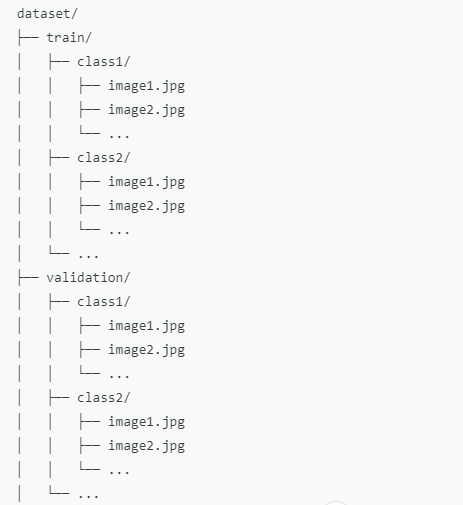
The dataset was structured in a way that allowed for easy training and validation processes, ensuring that the model could generalise well to unseen data.
Developing the AI Model
To create a robust and efficient AI model for plant health detection, the process was divided into multiple phases.
The first step is to create a Python project for processing the dataset and preparing it for AI model training.
The second step in building the model was preparing the dataset for training. All images were resized to 224x224 pixels, matching the input size required by the MobileNetV3Large model, which is a compact and efficient neural network architecture. This ensured consistency in the input data. Instead of manual normalisation, the data was processed directly by TensorFlow's image_dataset_from_directory, which efficiently handles image scaling.
Next, to enhance the model's ability to generalise, data augmentation was performed using a TensorFlow Sequential model. Techniques like horizontal flipping, random rotations, and zooming were applied. These augmentations simulated various real-world conditions, such as different angles and lighting, helping the model become more resilient to variability.
def load_datasets(train_dir, validation_dir):
    train_dataset = tf.keras.utils.image_dataset_from_directory(
        train_dir,
        image_size=(224, 224),
        batch_size=32,
        label_mode='categorical'
    )
    validation_dataset = tf.keras.utils.image_dataset_from_directory(
        validation_dir,
        image_size=(224, 224),
        batch_size=32,
        label_mode='categorical'
    )

    data_augmentation = Sequential([
        RandomFlip("horizontal"),
        RandomRotation(0.2),
        RandomZoom(0.2),
    ])

    class_names = train_dataset.class_names

    AUTOTUNE = tf.data.AUTOTUNE
    train_dataset = train_dataset.map(lambda x, y: (data_augmentation(x), y), num_parallel_calls=AUTOTUNE)
    train_dataset = train_dataset.prefetch(buffer_size=AUTOTUNE)
    validation_dataset = validation_dataset.prefetch(buffer_size=AUTOTUNE)

    return train_dataset, validation_dataset, class_names
The model uses a Convolutional Neural Network (CNN) to analyse leaf images, with MobileNetV3Large as its efficient and lightweight core — perfect for mobile devices. To adapt it for plant health detection, extra layers were added:
A GlobalAveragePooling2D layer simplifies the feature maps by reducing their size while keeping the most important information.
A Dense layer with 1024 units (using Swish activation) extracts detailed features from the data to improve the model's understanding.
A final Dense layer with softmax activation converts the features into probabilities to classify health statuses.
During the initial training, the base model was frozen to make use of its pre-trained features.
def create_model(base_model, num_classes):
    base_model.trainable = False  # Freeze base model layers
    x = GlobalAveragePooling2D()(base_model.output)  # Pooling to reduce dimensions
    x = Dense(1024, activation='swish')(x)  # Dense layer for feature extraction
    x = tf.keras.layers.Dropout(0.5)(x)  # Dropout to prevent overfitting
    predictions = Dense(num_classes, activation='softmax')(x)
# Output layer
    return Model(inputs=base_model.input, outputs=predictions)

base_model = MobileNetV3Large(weights='imagenet', include_top=False, input_shape=(224, 224, 3))
model = create_model(base_model, num_classes)
The model was trained using the categorical crossentropy loss function (suited for multi-class classification) and the Adam optimiser for faster and smoother learning. A separate validation set was used to check the model’s accuracy and loss after each training cycle, ensuring it learned well without overfitting.
model.compile(
    optimizer='adam',
    loss='categorical_crossentropy',
    metrics=['accuracy']
)

early_stopping = EarlyStopping(monitor='val_loss', patience=5, restore_best_weights=True)
reduce_lr = ReduceLROnPlateau(monitor='val_loss', factor=0.2, patience=3)

history = model.fit(
    train_dataset,
    epochs=10,
    validation_data=validation_dataset,
    callbacks=[early_stopping, reduce_lr]
)
To use the trained model in a Flutter app, I converted it to TFLite format. TensorFlow Lite is optimised for mobile and embedded devices, making it the perfect choice for deploying the model on a Flutter app.
model.save('plant_health_model.keras')
converter = tf.lite.TFLiteConverter.from_keras_model(model)
tflite_model = converter.convert()


with open('plant_health_model.tflite', 'wb') as f:
    f.write(tflite_model)
Finally you can run the script and wait for it to complete to get your trained model.
Implementing the AI-powered Flutter app
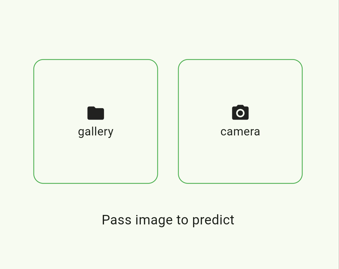
The Flutter app integrates the TFLite model using the tflite plugin. The app allows users to upload or capture an image, processes it through the AI model, and displays the classification result. The interface was designed to be intuitive and user-friendly, enabling seamless interaction.


To implement the AI functionality, we create an AIService class that utilise a TensorFlow Lite model (plant_health_model.tflite) designed for image classification. TensorFlow Lite enables efficient execution of machine learning models on mobile devices, allowing the app to provide predictions without requiring a constant internet connection or high-end hardware. This allows users to use the application with limited processing power or in areas with limited network access.

To prepare images for the AI model within the Flutter app, the image package was used. This Dart library supports tasks like resizing, cropping, and pixel-level manipulation, ensuring the images are formatted correctly for TensorFlow Lite inference.
Before the AI model processes an image, it undergoes a preprocessing pipeline managed by the prediction function:
Resizing Images: The image is resized to 224x224 pixels using the img.copyResize method. This ensures consistency with the dimensions expected by the model for optimal performance.
Preparing Pixel Values: The pixel values of the resized image are extracted and converted into a Float32List. Each pixel's red, green, and blue (RGB) values are processed directly, maintaining precision and compatibility with the model’s input requirements.
These steps ensure that any image, whether captured by the user or uploaded, is prepared in a format that maximizes the model's predictive accuracy.
    final imageInput = img.decodeImage(imageFile.readAsBytesSync()) ?? img.Image(width: 224, height: 224);
final inputImage = img.copyResize(imageInput, width: 224, height: 224);
final input = _imageToByteListFloat32(inputImage);

...

Float32List _imageToByteListFloat32(img.Image image) {
    const inputSize = 224;
    final convertedBytes = Float32List(1  inputSize  inputSize * 3);
    var pixelIndex = 0;

    for (var y = 0; y < inputSize; y++) {
      for (var x = 0; x < inputSize; x++) {
        final pixel = image.getPixel(x, y);
        convertedBytes[pixelIndex++] = pixel.r.toDouble();
        convertedBytes[pixelIndex++] = pixel.g.toDouble();
        convertedBytes[pixelIndex++] = pixel.b.toDouble();
      }
    }
    return convertedBytes;
  }
In the model's implementation, reshaping plays a crucial role in ensuring that the data aligns with the model's expected input and output shapes. The input image is reshaped to a tensor of [1, 224, 224, 3], representing a batch size of 1, with a resolution of 224x224 pixels and three color channels (RGB). Similarly, the output is reshaped into [1, 39], corresponding to the batch size and the number of classes (39 in this case). This reshaping ensures seamless compatibility between the data and the model's architecture during processing.
final reshapedInput = input.reshape([1, 224, 224, 3]);
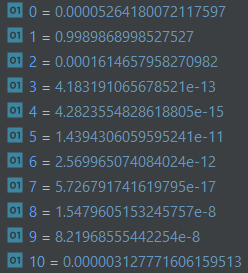
final output = List.filled(39, 0).reshape([1, 39]);The processed image is then passed into the TFLite model using its Interpreter. Tre model analyzes the image and returns a list of probabilities, each representing the likelihood that the plant belongs to a specific health category. This streamlined workflow ensures users receive real-time feedback, making the app intuitive and responsive.
Here you can see the category index and the probability of a match in the range from 0 to 1.
Here’s an example of the Flutter code for loading and using the model:
class AIService {
AIService._(this._interpreter);
late final Interpreter _interpreter;
static Future<AIService> init() async {
final interpreter = await Interpreter.fromAsset('assets/ai/plant_health_model.tflite');
return AIService._(interpreter);
}
Future<PredictionResultModel> predictImage(File imageFile) async {
final imageInput = img.decodeImage(imageFile.readAsBytesSync()) ?? img.Image(width: 224, height: 224);
final inputImage = img.copyResize(imageInput, width: 224, height: 224);
final input = _imageToByteListFloat32(inputImage);
final reshapedInput = input.reshape([1, 224, 224, 3]);
final output = List.filled(39, 0).reshape([1, 39]);
_interpreter.run(reshapedInput, output);
final plantDate = PlantDataSource.plantData[_findIndexOfMax(output.first as List<dynamic>)];
...
}
...
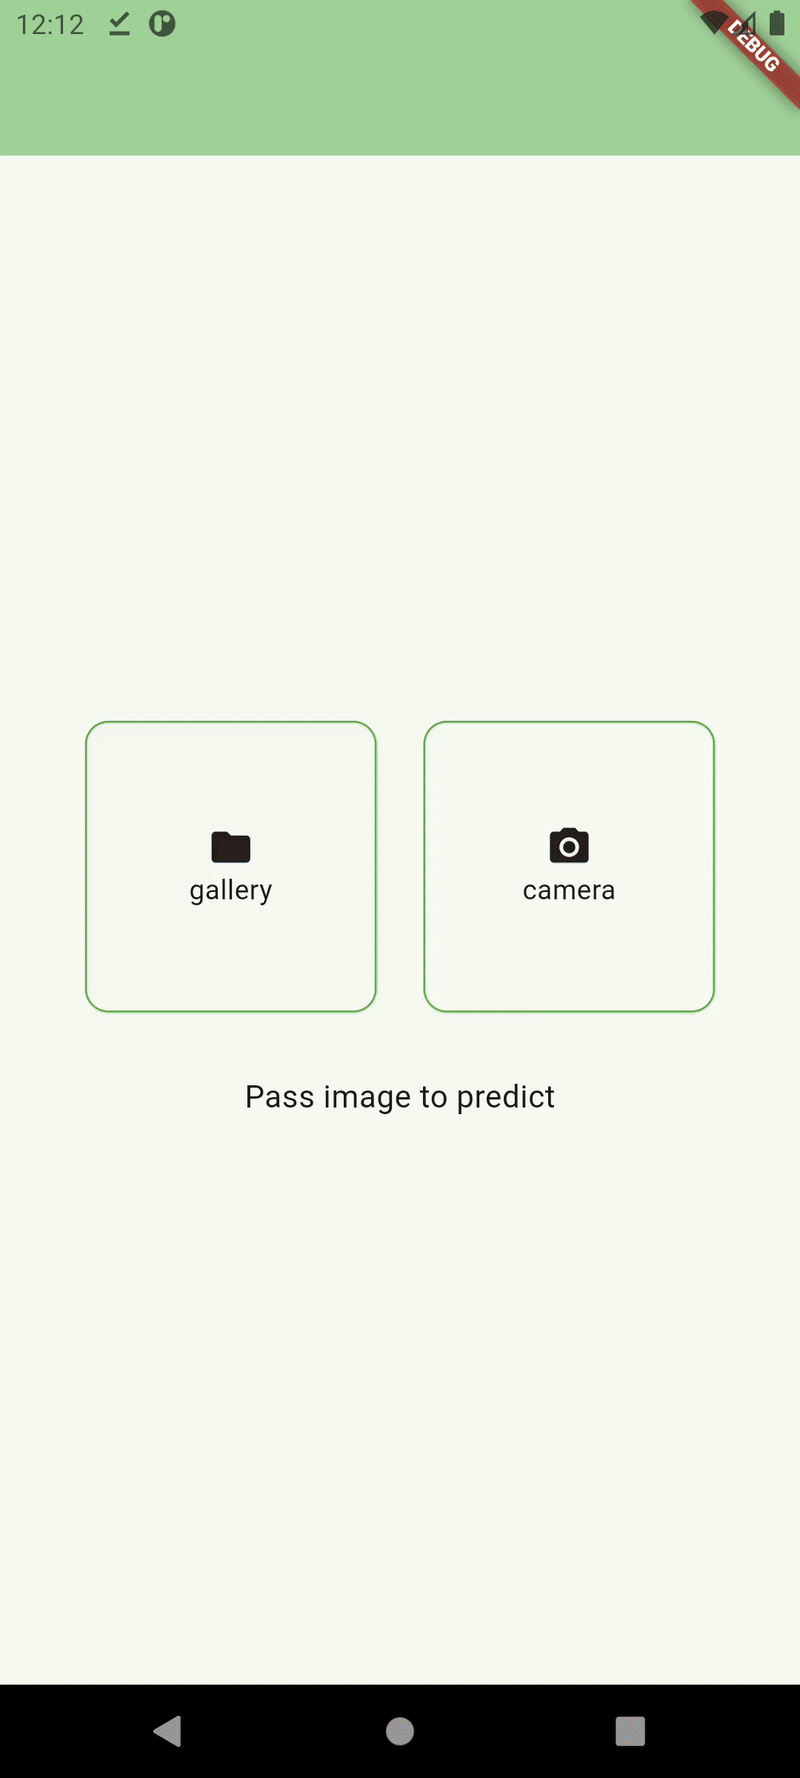
}Here’s a look at the final application in action!
Conclusion
This project provided valuable insights into AI development and its integration with Flutter. By combining a trained AI model with a mobile app, it is possible to create practical tools that benefit not only agriculture but also various other fields. The journey from dataset preparation to model deployment was both challenging and rewarding, offering a comprehensive learning experience 📚.
Working with such models requires thorough attention to every step, from data preparation to optimisation for mobile devices 📱. This enables the creation of efficient and fast solutions that can operate even with limited resources. The process of integrating AI into a Flutter app demonstrates how modern technologies can improve the quality of work and life for users 🌟.
Our team of AI specialists is ready to assist you in building cutting-edge applications 💡 that exceed expectations and provide exceptional user experiences 🚀.
The full code from this article will be here 📂


Kommentare